Omarchy 2.0 - LazyVim Basics
Damn it, I said the previous post would be the last one in the Omarchy series, but I figured this was a good chance to evangelize a bit about Vim too. I’ve already recommended following @Taq’s channel, where he explains in much more depth how NeoVim works. There’s also Primeagen’s “vim-be-good” tutorial. That second one in particular is an interactive tutorial inside NeoVim itself, to practice navigation - which many people find hard at first.
I’ll do only this one article about it and I don’t intend to cover more than the tip of the iceberg. The idea is to serve whoever is coming from other editors like Sublime Text or VS Code and can’t even start navigating or even quit Vim lol 🤣.
Initial Commands
As I said in the previous post about LazyVim, I’ll assume you already understand at least how to install support for your language with LazyExtras and already learned to version things using Mise.
Without even getting into LazyVim, the first thing to know is that it installs all the relevant configurations in the ~/.config/nvim directory. Normally you don’t need to touch anything there. Leave files like lazyvim.json alone. Notice that it does the same thing as any NPM out there: there’s a lazy-lock.json file that declares the version/commit of each installed plugin. LazyVim does something similar to an npm install. Just a curiosity so you know how it organizes itself.
If you need to customize something, it’s usually going to be in the ~/.config/nvim/lua/config directory. That’s where I added Mise support, for example:
~/.config/nvim
❯ cat lua/config/mise.lua
-- Prepend mise shims to PATH
vim.env.PATH = vim.env.HOME .. "/.local/share/mise/shims:" .. vim.env.PATH
They’ll always be scripts written in Lua. And you don’t even need to know Lua deeply. At a glance it’s a very simple language, not very different from Python or Javascript and any programmer should be able to read any snippet without any problem. Besides, in most cases you’ll be copying configurations you got from the documentation, wiki or ChatGPT itself, so you just need to know that things go in this location.
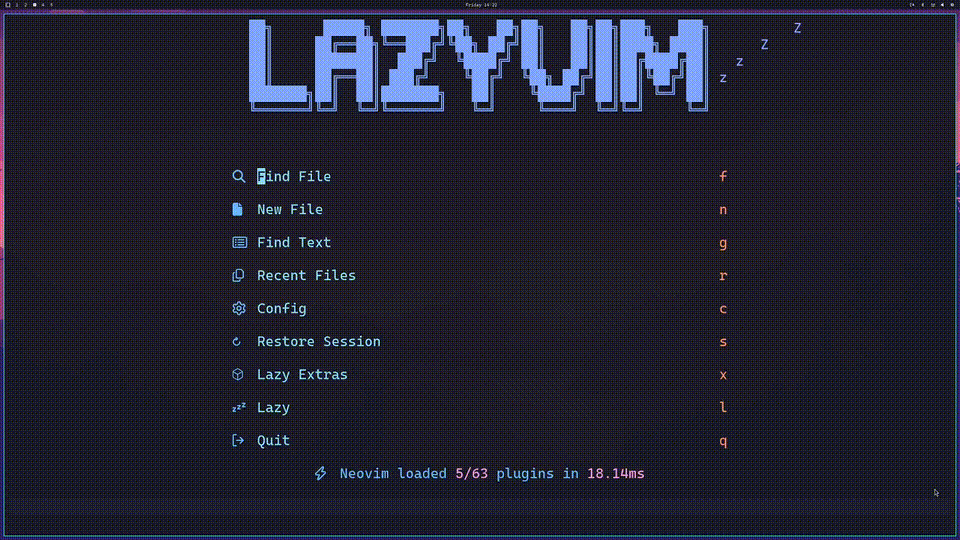
Understand that NeoVim has the concept of the “Leader” key, a key that precedes hotkeys for other commands (there’s also localleader which is backslash \). This is configurable but in LazyVim the Leader is the “Space” key. In a lot of documentation we’ll see people saying “press Leader-w”, which means Space+w and now you know what that means.
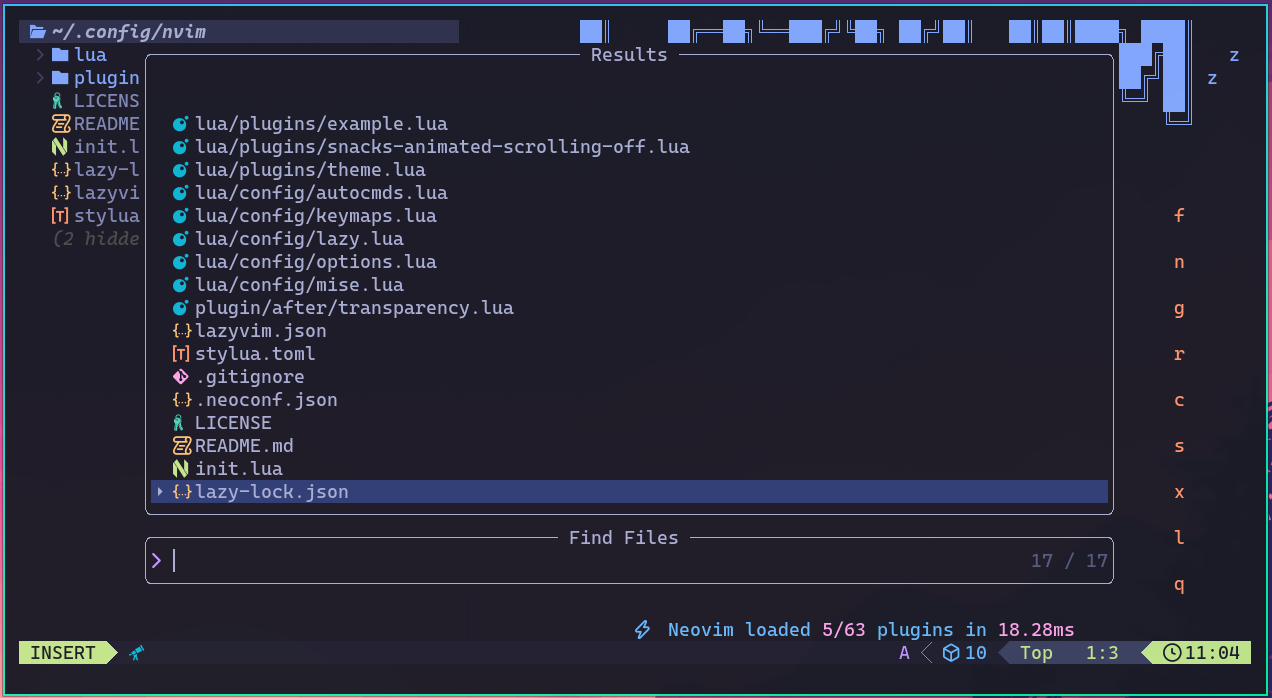
To open a file there are at least 3 different ways, 2 of them shown in the image above:
Space+E opens NeoTree, which is that sidebar on the left that looks like Windows Explorer. You can navigate with the keyboard or even with the mouse. Find your file and press “Enter” to open it, then “Space+E” again to hide the sidebar. If you want to know how to create a new file, a new subdirectory, rename things and so on, type ? (question mark) to see this help:
The third way is manually with the :e command followed by the file name in the local directory. It has autocomplete too, this is the fastest way, if you know what you’re looking for.
Whenever you want to cancel anything or close “floating windows” (pop-ups, dialog boxes). Just press “Esc”. Esc is fundamental in NeoVim.
Once a file is open, it sits in the Buffer. Think of Buffer as “Open Tabs” in your VS Code. To navigate through Buffers (like alt+tab between your already-opened files) it’s simple:
- ]+b for next “tab” (next Buffer)
- [+b previous Buffer
- Space+bd to “close the tab” (close the Buffer)
- Space+bo to stay where you are and close the other buffers
Open as many files as you want. If one of them is one of those huge logs you opened by accident, Space+bd to close it and done.
Speaking of closing, how do you exit NeoVim? There are several ways:
- Space+q
- :q
- :q!
The difference: the first is the custom way in LazyVim. The second is the standard way using the “commands” feature that always starts with “colon”. And the third is if you modified something in the file but want to cancel, exit without saving anything, hence the exclamation mark.
Normally I use :wq which means “write” and “quit”. So it first saves the changes to the file and then quits the program. It’s useful when I’m just quickly editing a config file.
Basic Navigation
Now I have a file open. How do I navigate through it? First, how do I go to the end of the file and then back to the beginning? This is something I use a lot, just type Shift+g to go to the end of the file and then gg to go back to the beginning. Simple as that.
Now let’s learn several commands at once:
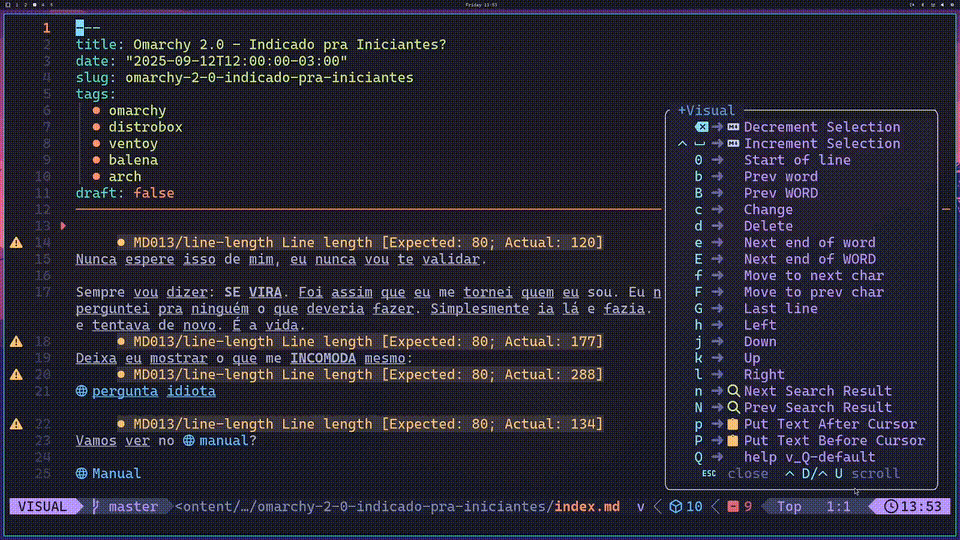
- Type v. This starts the “visual mode” which, in practice, means starting to select from wherever your cursor is.
- Type j. Which is the equivalent of “arrow down” to go to the line below. You’ve probably heard that in Vim you navigate with “hjkl” which are, respectively, left, down, up, right.
- Type x. Which is the equivalent of “cut” and putting the content in the clipboard. Having done that, typing p gives you “paste”.
- Type u. Which is the most-used command: Undo or undoing the last modification.
All of this works in what’s called “command mode”, which is the default mode Vim opens every file in. In this mode you can’t type any text. As you can see, each letter by itself is a command, like “x” for cut or “p” for paste.
To type, you first need to press i (just the lowercase “i” letter), which then switches from command mode to “edit mode”. Now just type your text normally, like in any editor. When you want some command, just press ESC to go back to command mode. We’ll be doing this all the time, which is why a lot of people remap the “caps lock” key on the keyboard to be ESC so it’s easy to just tap with your left pinky.
Combining Commands
Still in command mode, how do we navigate through the file more easily?
Beyond the “hjkl” keys, we can navigate more easily using b for “previous word” or w for next word:
Command mode lets you combine commands, so we can do:
- dw to delete the next word
- db to delete the previous word
- d4w to delete the next 4 words
- d4j to delete the next 4 lines down
Primeagen’s tutorial has several exercises for this kind of navigation, I recommend practicing. In VS Code everyone is used to first grabbing the mouse, marking the block they want to delete visually, then pressing delete or backspace. In Vim, we look at where the cursor is, press ESC to be in command mode, and type the operation and the location. Test all the combinations you can imagine.
This is the paradigm shift that bothers the lazy. But once you’ve learned this, you’ll find it annoying to use an editor that forces you to use the mouse for basic things.
Now it gets more interesting: what if instead of deleting a word, I want to replace the word where my cursor is with another word?
In a normal editor, you’d mark it with the mouse (or use some combination like “ctrl+shift+arrow”), and type over it or delete the word.
In LazyVim there are plugins configured for more interesting things. In the video above see how I’m replacing words “in-place”. You do this with the ciw command.
- ciw deletes the entire word under the cursor and opens edit mode for you to type the replacement
- ce deletes from the cursor to the end of the word (preserves the beginning of the word) and also opens for you to type in its place
- Shift-c (capital C) deletes everything from your cursor to the end of the entire line and opens for you to type.
But that still doesn’t look thaaaat cool. What if you want to change only the first letter of several lines at the same time, for example, in the text of the video above, I want to change only the hyphen ("-") of each tag line?
I said before that pressing v in command mode starts visual mode and you can select from there. But there’s Ctrl+v which opens vertical block selection mode.
In this mode we use the “hjkl” keys normally, like j to go down, but instead of marking the next entire line, it marks only the character right below your cursor. Now I can delete with d and type Shift-i (capital “I”) to enter edit mode at the beginning of the block and replace with whatever I want.
LazyVim has plugins for comments, but this is another alternative if you want to add “//” or “#” at the beginning of several lines to comment out, for example. In this case, read about the ts-comments plugin for better options for commenting. To start a new comment block, type gco to add a comment below.
“Block mode” as I showed above, is one of the things I use the most in code.
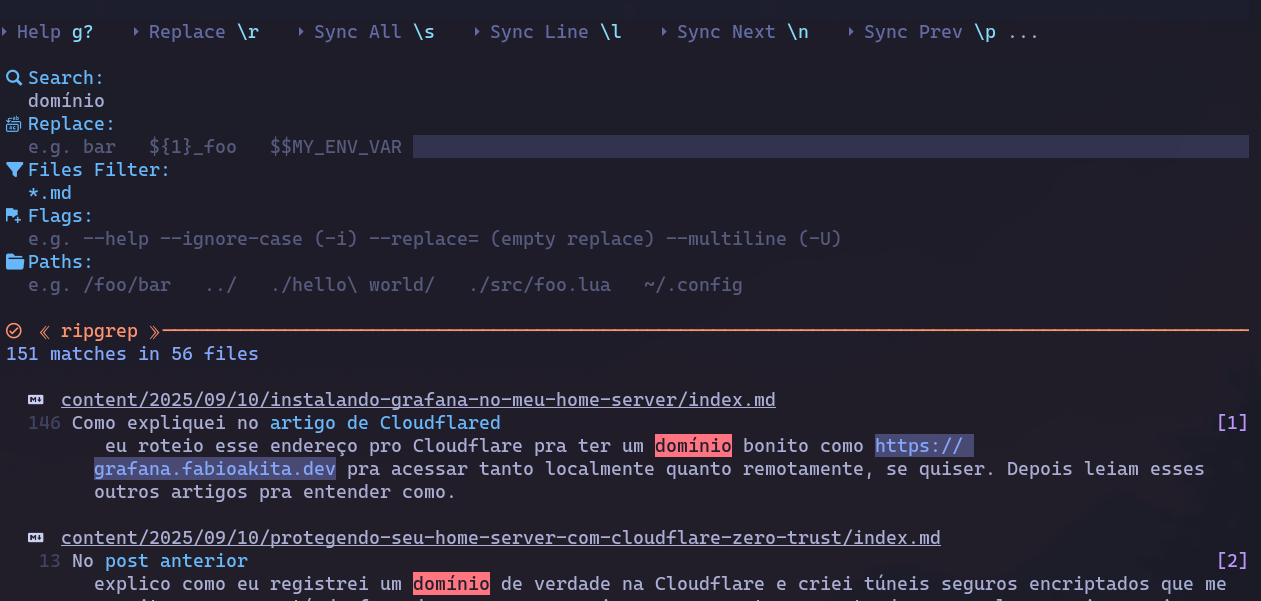
But only that is very little. What if you want to replace ALL IDENTICAL WORDS in the text at once. In the example video above, I want to replace “domínio” with “DOMAIN” and “Cloudflare” with “AWS Amazon”, how do I do that? This is “Search and Replace” that exists in every editor and in Vim it’s very easy:
We type :%s/domínio/DOMAIN/.
If you’re a programmer you’ve probably seen this syntax before. It’s the REGEX MATCH syntax. Yes, you have to know Regex (and no, it’s not PCRE nor Unicode, it’s NeoVim’s own Regex dialect, but it’s similar).
As I said before, “colon” opens the command-typing box, "%s" starts “search with regex” and between the slashes “//” first goes what you’re looking for and then what you want to replace it with.
But that’s the way in pure NeoVim; in LazyVim, there’s the grug-far plugin and you activate it with the SPACE+sr command:
Now yes, more like VS Code, right? Use whichever you find easier.
Conclusion
As I said, this is only the tip of the tip of the iceberg, the bare minimum of the bare minimum to at least start editing simple config files without opening Nano or VS Code just for that.
Read the LazyVim documentation. Check out the keymaps to discover other commands. Pay attention to every letter you press in command mode, LazyVim shows the available options. For example, let’s say I pressed g (goto), it will show a help in the bottom-right corner:
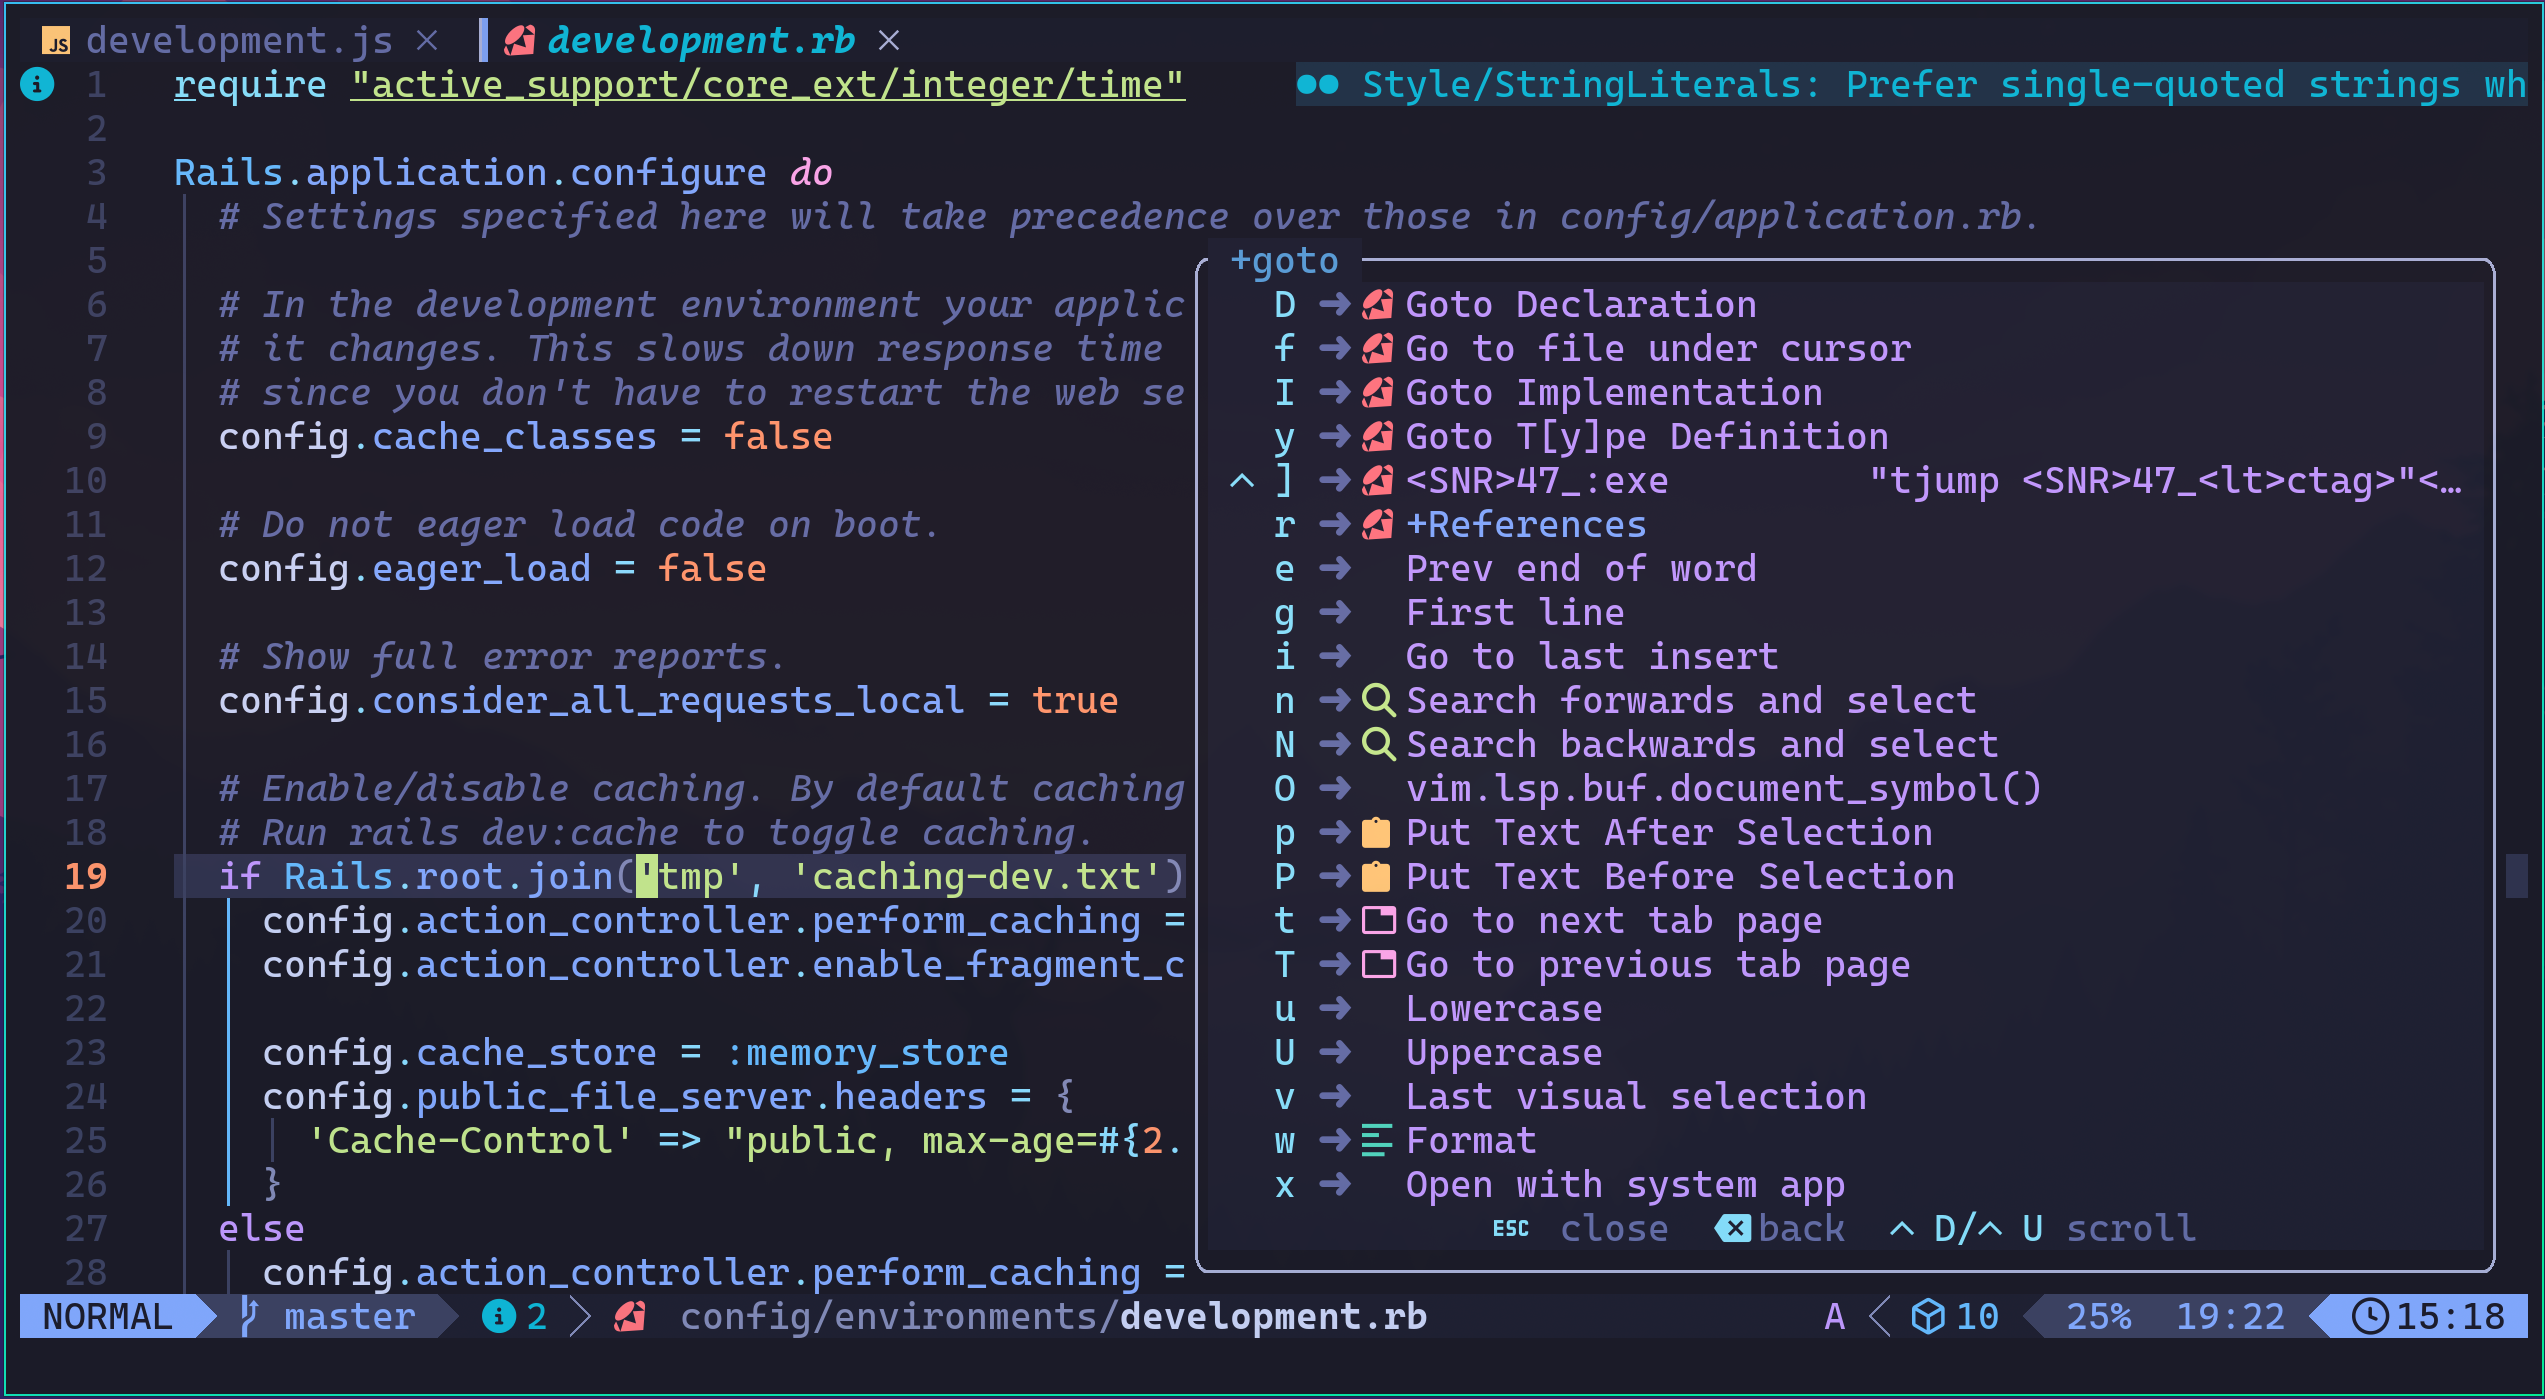
This way you can always discover new commands or remember commands you rarely use. That’s why I recommend LazyVim, which comes well configured to help you. The plugin that provides this feature is which-key, in case you want the same thing in a NeoVim you configured from scratch.
There are several Cheatsheets out there with tables of important command combinations. Worth exploring.
And there’s more: LazyVim comes with dozens of plugins for formatting, linting, integrated LSP, integrated GIT, and much more. There’s no way I can document each one here. Each of them has its own documentation on the LazyVim.org plugins page.
Again, don’t forget to call :LazyExtras and install the optional plugins for your languages.