Omarchy 2.0 - ZSH Configs
I’ve been really enjoying Omarchy as my desktop manager. Read my previous post to see how I installed it and tweaked it for my setup. Following that thread, Omarchy ships with Bash as the default shell. I prefer ZSH. Bash is perfectly usable, this is just personal preference. Some people prefer Fish or others. But Omarchy only ships with Bash for now, so I decided to modify the setup to support my ZSH.

If you want to switch to ZSH, it’s easy, just do this:
yay -S zsh zoxide
chsh -s $(which zsh)
Logout, login, and done. But now your shell will be empty. To grab my config do this:
git clone https://github.com/akitaonrails/omarchy-zsh.git ~/.config/zsh
ln -s ~/.config/zsh/.zshrc ~/.zshrc
There are two things you need to change. In .zshrc remove this line:
source ~/.config/zsh/mountsThat’s just for me to check my NFS mounts to my NAS. It’s useless to you so you can remove it.
The second thing is to create a new file for secrets:
touch ~/.config/zsh/secrets
chmod 600 ~/.config/zsh/secrets
This is where you put stuff like your OpenAI or Google Cloud keys or anything like that. For example:
# ~/.config/zsh/secrets
export OPENAI_API_KEY="sk-xx-v1-xxx...xxxxx"
That way your secrets stay separated from your configs and we can git push to a repository without worrying that something might leak in the future. Always keep secrets, passwords, and keys separated locally. This is already in .gitignore so you’re safe.
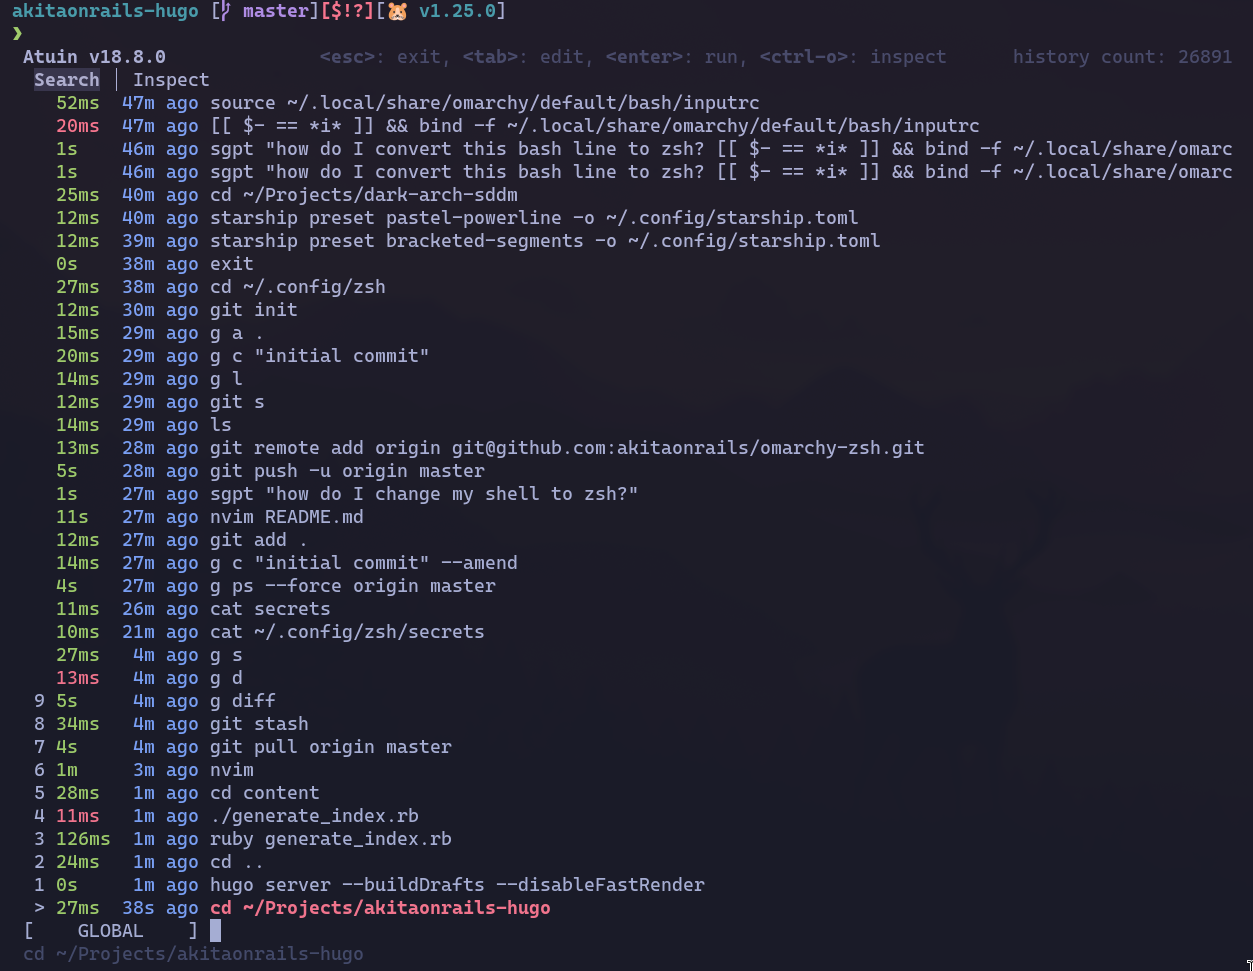
As a bonus, in ~/.config/init I added support for Atuin, a tool that syncs all the command history you ran in your shell to a “cloud” repository (read the docs, you can create your own local server too). The repository is encrypted, so it’s safe even if your history contains secret keys in the commands.
Install it like this:
yay -S atuin
atuin register -u <your username> -e <your email>
atuin import auto
atuin sync
As soon as you register, Atuin will generate a random encryption key. Make sure you store this key somewhere safe like 1Password, Bitwarden or another secure vault!! Without it you won’t be able to decrypt on a new installation. If you forget, you can still view it before reinstalling, like:
atuin keyIf you reinstall your machine or set up a new one and want your history back, just install Atuin and run:
atuin login -u <your username>
atuin sync
It will ask for your password and encryption key and bring all your history back.
With my config, just hit Ctrl+R to bring up the history search (which from now on will live in a sqlite on your machine). Read the documentation for more features.
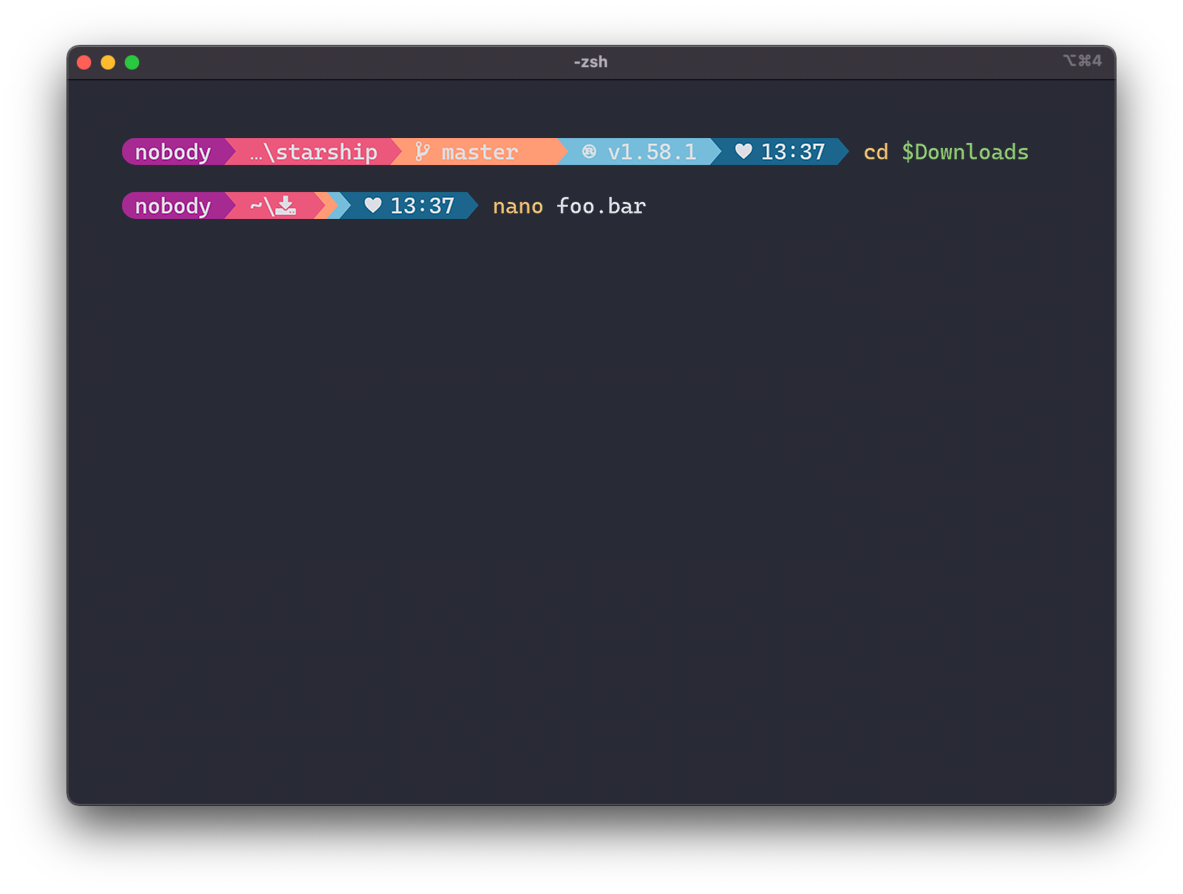
DHH set up the Starship prompt using the old PS1 variable style. But Starship already has several nice prompts that are easy to use as “presets”. I picked Pure Prompt, which I like, but there are plenty of others. If you want something flashier and more colorful, there’s this Pastel Powerline:
 Pick your favorite on the Presets page and change
 ~/.config/zsh/prompt on this line:
starship preset bracketed-segments -o ~/.config/starship.tomlFinally, I left some ENVs in ~/.config/zsh/envs that work for my Ollama tests and things like that, but it’s good for you to know they’re there so you don’t find it weird if your Ollama is behaving strangely. Edit the ~/.config/zsh/envs file to set the envs you prefer:
# envs
export OPENAI_API_BASE="https://openrouter.ai/api/v1"
export DEFAULT_MODEL="o1-mini";
export OLLAMA_API_BASE=http://127.0.0.1:11434
export OLLAMA_HOME=http://127.0.0.1:11434
export OLLAMA_MODELS=/mnt/gigachad/ollama/models
Also modify the ~/.config/zsh/aliases file to include aliases you prefer:
# aliases
alias monhd="sudo ddcutil -d 1 setvcp 60 0x12"
alias mondp="sudo ddcutil -d 1 setvcp 60 0x0F"

alias sgpt='docker run --rm -e OPENAI_API_BASE=${OPENAI_API_BASE} -e OPENAI_API_KEY=${OPENROUTER_API_KEY} ghcr.io/tbckr/sgpt:latest txt '

alias git='nocorrect git'
git config --global alias.a 'add'
git config --global alias.ps 'push'
git config --global alias.pl 'pull'
git config --global alias.l 'log'
git config --global alias.c 'commit -m'
git config --global alias.s 'status'
git config --global alias.co 'checkout'
git config --global alias.b 'branch'
The first two aliases are for my dual monitor setup where one of the monitors receives signal from both the HDMI input and the DisplayPort input (I have 2 GPUs). If you didn’t know, you can control that from the shell. Read this post about ddcutil
Next you get the sgpt command. Omarchy already ships with Docker installed. Now from the shell you can ask ChatGPT without having to open a web browser for it:
sgpt "what is the rsync syntax to sync two directories?"Read the SGPT documentation to learn about other features or which LLMs you can choose.
At the end we have aliases for Git. Omarchy already has an alias making “g” mean “git” and with this one I added you can do:
git add . # old
g a . # new

git commit -m "initial commit" # old
g c "initial commit" # new

git commit --amend -m "initial commit"
g ca "initial commit"

git push origin master
g ps origin master

git pull origin master
g pl origin master

git log
g l

# and so on
More practical and less verbose. Add more aliases as your workflow demands in ~/.config/aliases.
And I think that’s it, now my Omarchy is organized the way I like. Make your own tweaks so everything fits your style too!